
Getting Started
Before using the TTLock n8n node, complete the following prerequisites.
Prerequisites
- n8n workflow platform (version >= 1.0.0)
- Self-hosted: Recommended to deploy for free on a server via Docker
- Cloud: You can use the Cloud version from n8n.io (note: 14-day free trial, paid subscription required after)
- A TTLock App account
You need to provide your own Client ID and Client Secret from the TTLock Open Platform. See Authentication for registration steps.
Install the Node
Method 1: Install from n8n UI (Recommended)
- Open n8n, go to Settings → Community nodes
- Click Install a community node
- Enter package name
n8n-nodes-ttlock, click Install - Restart n8n for the node to take effect
Method 2: Command Line Installation
npm install n8n-nodes-ttlockRestart n8n after installation.
Quick Start
After installation, follow these steps to quickly try out the plugin.
1. How to Pass Parameters
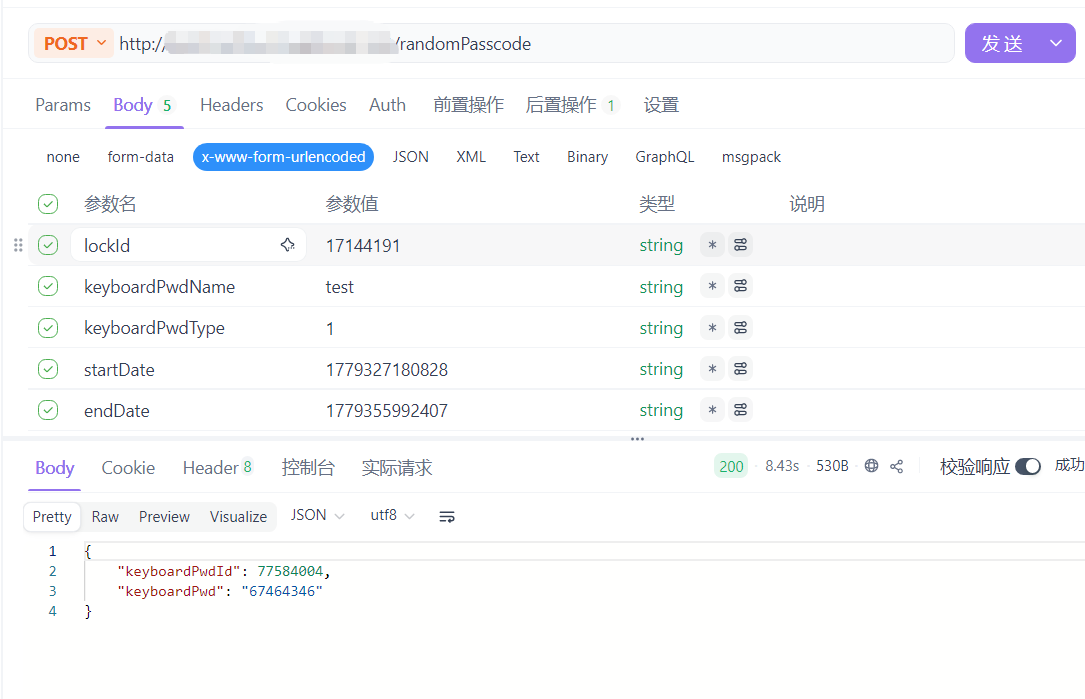
You can use Webhook or Apifox to pass parameters into the workflow.
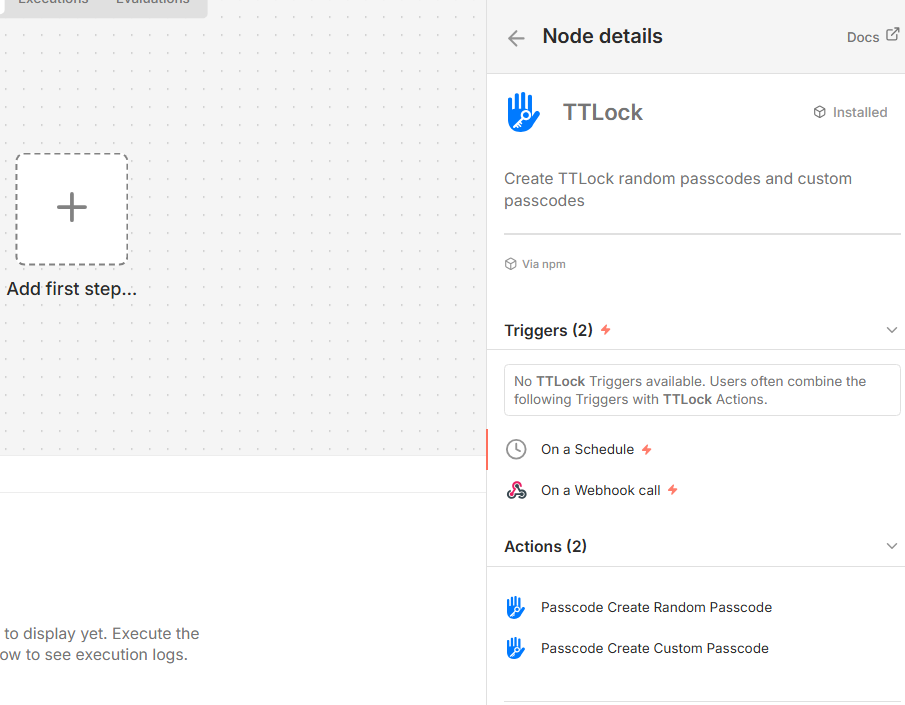
2. Search and Add TTLock Node, Select Operation Type
Click + on the n8n canvas, search for TTLock, click TTLock to enter the plugin details, then choose the specific operation in Actions.
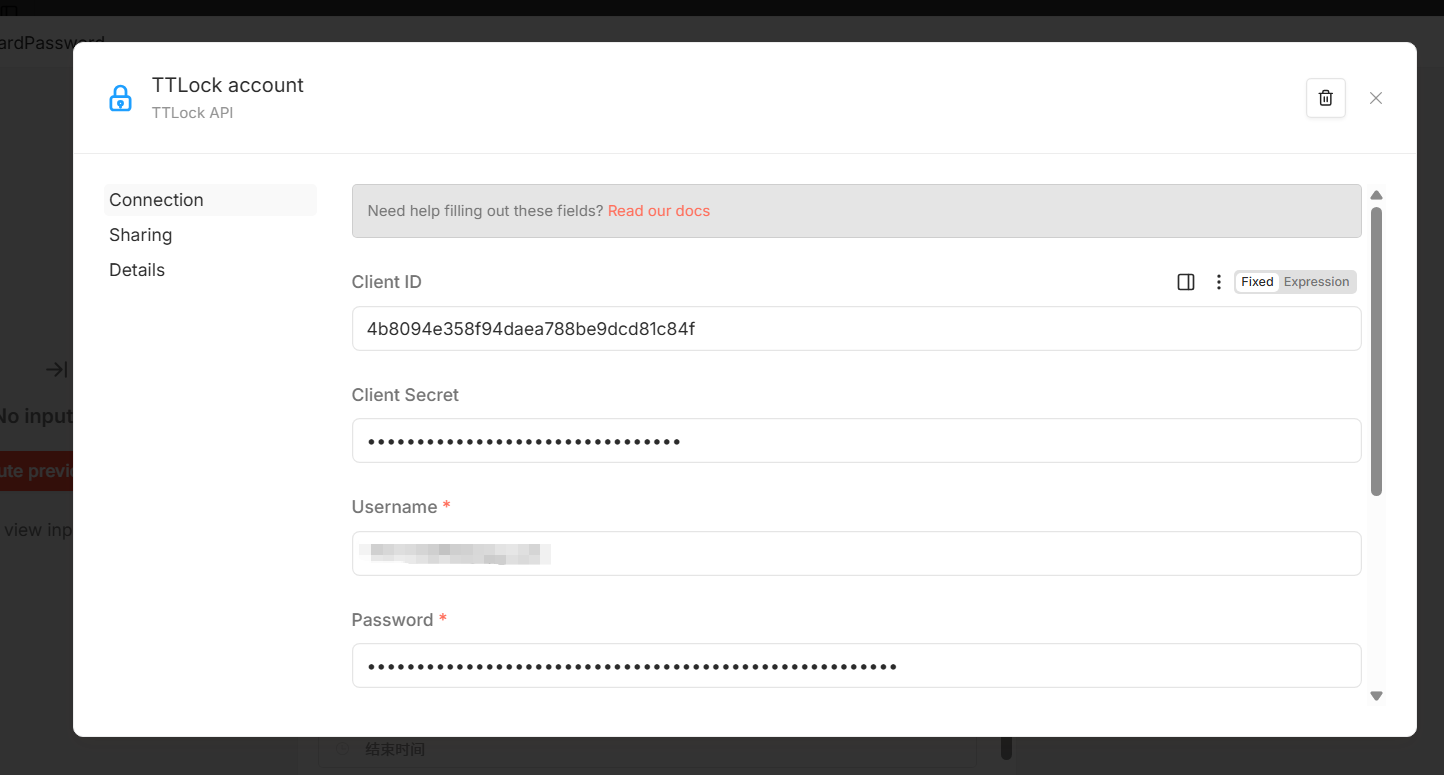
3. Configure Credentials
In the Credential dropdown, select Create new credential, then fill in your TTLock App credentials:
| Field | Description | Example |
|---|---|---|
| Client ID | Open platform Client ID | your_client_id |
| Client Secret | Open platform Client secret | your_client_secret |
| Username | TTLock App username | your@email.com |
| Password | TTLock App password | yourpassword |
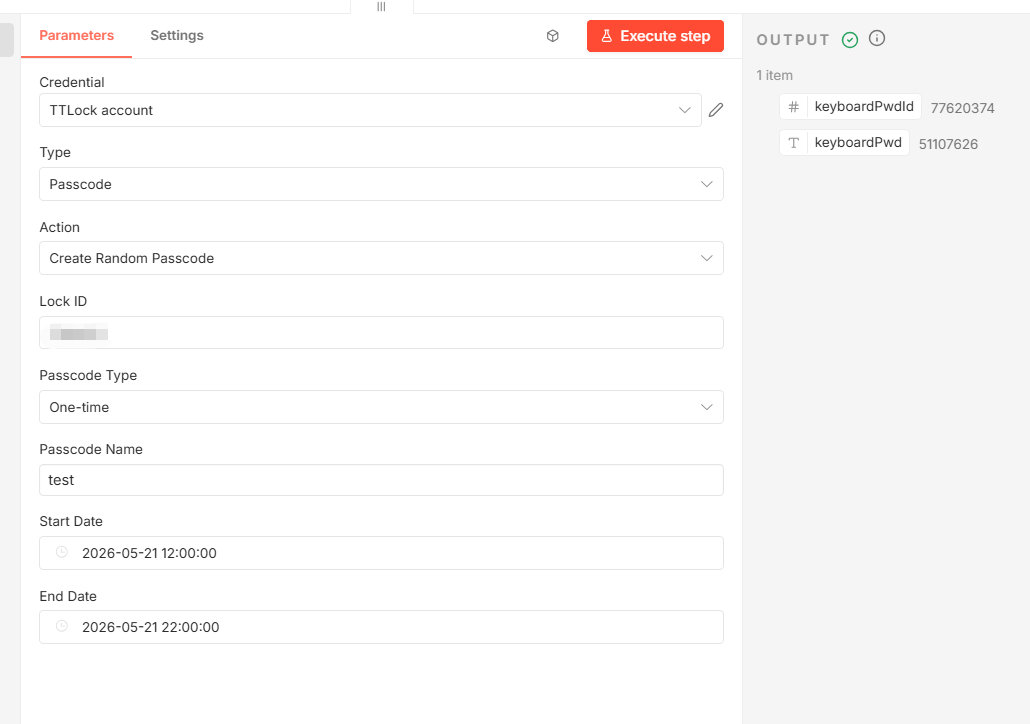
4. Fill Parameters and Execute
You can choose two ways to pass parameters:
- Fixed values — Fill parameters directly in the node:
- Expression — Dynamically get parameters from upstream nodes via n8n expressions, suitable for Webhook/API call scenarios:
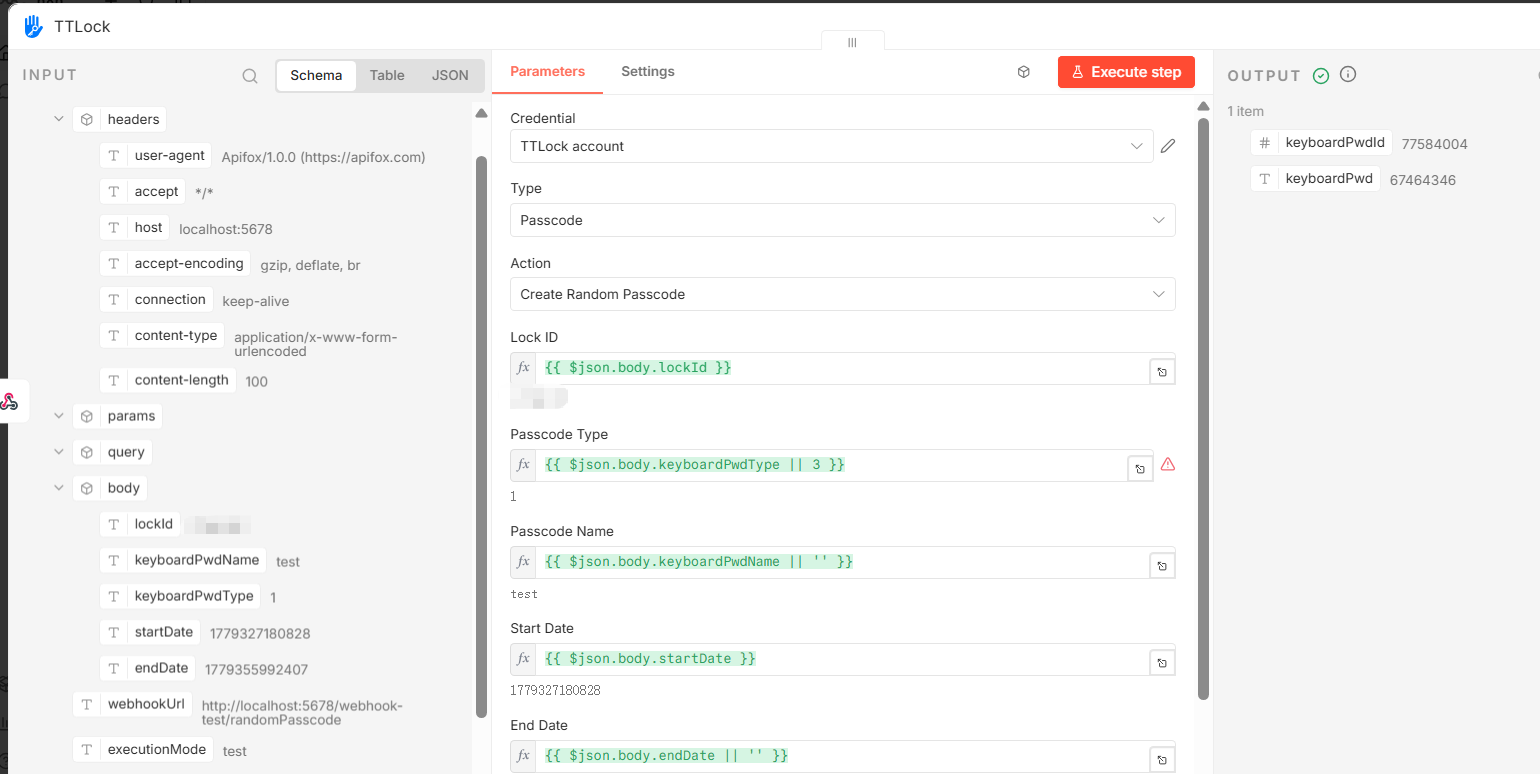
Click Execute Node to run and see the results.
Next Steps
- Authentication — Create TTLock API credentials in n8n